Types Of Glass Finishes For Your Home

18

Jan
2023
Posted By : Rachel Bownds 0 Comment
Types Of Glass Finishes For Your Home
Categories :Windows

Glass is naturally transparent and clear glass is what you’d typically expect to find in your home. Did you know that there are many other finishes available though? Different types of glass can be used for better insulation, privacy, and protection.

In this article we’re going to look at what glass finishes are, the different types available, and why you might want to use them.

What are glass finishes?

A finish is the surface style of glass. You may be familiar with two categories – clear glass and privacy glass. You might want to have a style of privacy glass in areas of your home such as your front door or bathroom. This could mean it is frosted, patterned, or even tinted glass.

Whatever finish you have, natural light will still shine through.

Methods of creating glass finishes

When glass has a finish to it, it has been treated to make it less transparent. There are several ways that this can be done:

  • Sandblasting – With sandblasting, the surface of the glass is, as you may expect by the name, blasted with sand at high speed. This method scratches the glass and as a result the glass is less transparent.
  • Acid etching – Acid etching glass means that the glass is treated with hydrofluoric acid. This is corrosive and gives the glass a smooth frosted look.
  • Films – A film is the easiest way to alter the look of your windows and doors. A self-adhesive film is applied to the glass pane. The great thing about films is that they are not permanent, so can be changed as often as you like.

Types of glass finishes

Tempered glass

Stronger than standard glass, tempered glass is commonly used in front door glass. If broken, it is designed to shatter into small pieces without jagged edges. Making it a safer option for glass doors.

Frosted glass

Frosted glass is just that – glass that appears to have a frosted look. This finish can be applied to the while panel or just part of it and is a great way to add more privacy.

Satin glass

Satin glass is similar to frosted glass, only it is smoother and less shiny, and is another good way to create privacy.

Textured glass

Textured glass is any glass that has an embossed design or is bubbled.

Expert help and advice

As a homeowner, it can be helpful to talk to a windows expert and we’re here to offer our expertise. Our highly-skilled team can talk through your needs and advise you on the best option for your home.

We hope that you’ve found this article useful. Contact us today with any questions, or to arrange a consultation.

A Guide To Stippolyte Glass

05

Dec
2022
Posted By : Rachel Bownds 0 Comment
A Guide To Stippolyte Glass
Categories :Windows

When you think of the glass in your home windows, clear double-glazed windows may be the first type that comes to mind. In rooms where you may want more privacy though, such as your bathroom, textured glass is a popular choice.

This privacy glass is called stippolyte glass. In this article, we look at the many benefits of this type of glass, the different styles available, and where you might install this in your home. Read on to learn more.

What is stippolyte glass?

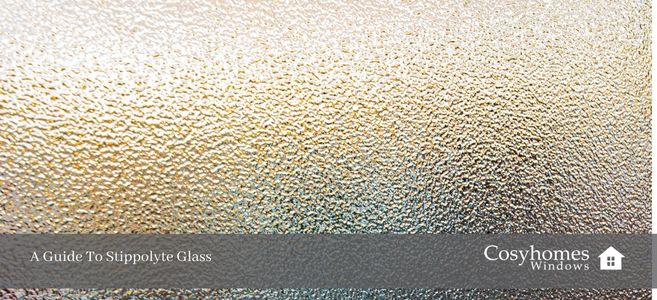
Stippolyte glass is a frosted type of glass that is often used to create high obscuration of the room from the outside looking in. It distorts light as it hits the window and is a particularly good choice for bathrooms.

Another room that you could use this in is a downstairs toilet if you have one. Particularly good if the toilet is street-facing. It’s also often installed in UPVC front doors. The frosted effect will make the interior blurry, soft, and undefined. Privacy guaranteed!

Pros and Cons

If you’re considering stippolyte glass for your home, it’s worth knowing the pros and cons of these types of glass panels.

Pros

  • Privacy – The most obvious benefit is of course privacy. Stippolyte is an obscure glass and will create privacy in any room that you choose to install it.
  • Noise reduction – This is an advantage in rooms such as a downstairs toilet as it will reduce the noise of a noisy toilet.
  • Energy efficient – Double-glazed stippolyte glass creates good insulation, making it energy efficient. They can also reduce condensation which is great in bathrooms where this can be a real problem.
  • Mould reduction – Mould can cause many health problems and make it harder to keep your windows clean. Installing double glazed stippolyte glass in rooms where there is a lot of moisture, such as your bathroom or shower room, will reduce the possibility of mould occurring.
  • Styles to suit your preference – Choose from either 4mm or 6mm glass thickness and a pattern to suit your home – from acid-etched glazing to frosted and floral.

Cons

  • Cost – Stippolyte glass can be expensive.
  • Too much privacy! – By this, we mean you may actually want to see the other side of the glass. For example, if you have this installed on your front door it makes it harder to know who is there – not so good if you want to avoid cold callers!

Expert help and advice

As a homeowner, it can be a big investment to change your windows. If you’re wondering whether it is worth it or what the best option would be, we’re happy to offer our expertise. Our highly-skilled team can talk through your needs and advise you on the best option for your home.

We hope that you’ve found this article useful and please do contact us with any questions, or to arrange a consultation.

Replacing Misted Windows

20

Oct
2022
Posted By : Rachel Bownds 0 Comment
Replacing Misted Windows
Categories :Windows

Now that autumn is in full swing we’re all noticing a drop in the temperature. Colder days mean warmer clothing and, just as our wardrobes change to make way for cosy knits, you may notice your home changing too. More specifically, your windows.

It’s common to notice some condensation on the outside of your double-glazed windows at this time of year, especially first thing in the morning as the air outside settles on a cold surface.

Condensation on the outside actually means your double-glazed unit is working properly. It’s when you notice condensation and misting between the panes of glass that there could be a problem.

In this article, we’re going to look at some of the common causes of mist in double-glazed windows, how to fix it, and the benefits of replacing your window seals.

Causes of mist in double-glazed windows

When you notice condensation on your windows it can be hard to work out where it’s located. If you’re unsure, it’s worth consulting a professional who will be able to advise you on how to work out where the misting is located. Alternatively, they could visit your home to check all is well with your window installations.

Cleaning your windows regularly will also help you to keep an eye on the condition of your windows and spot any weaknesses in the frame or glass.

Some common causes of this mist are:

Airflow

In a room with poor airflow, you’re likely to notice a build-up of condensation on your windows. Make sure to open your windows at regular intervals throughout the day to allow air to circulate.

Curtains and nets

Curtains and nets can improve energy efficiency in your home however if they sit very close to the window they can cause a build-up of moisture. Keep a generous gap between them and the surface of the window.

Bathroom doors

After you take a bath or shower keep the bathroom door closed to stop steam from travelling onto windows in the next room. This can cause condensation on the windows.

Drying clothes

In the colder months, it’s harder to dry clothes on the washing line. So of course, you dry your clothes on an airer inside. What this does though is create a lot of condensation on your windows, particularly if you’re drying them on a radiator, as the water droplets find their way to your windows. Try to make the most of sunny days!

Benefits of replacing window seals

Depending on the age of your UPVC windows, it may be worth replacing your window seals if condensation is a problem. If your windows are fairly new they will be covered by a warranty however, if not, you should consult a professional.

The benefits of replacing your window seals include:

  • improved energy efficiency in your home
  • a boost to the value of your property
  • a better view from your windows – no more misting!

Expert help and advice

We hope that you’ve found this article useful and please do contact us with any questions, or to arrange a consultation about misting on your windows.

Cosyhomes Windows is here to advise you on the best option for your home. Don’t hesitate to get in touch with us.

Best Way To Clean Windows Without Streaks

27

Sep
2022
Posted By : Rachel Bownds 0 Comment
Best Way To Clean Windows Without Streaks
Categories :Windows

As autumn approaches and the nights draw in it can be easy to forget about keeping your windows clean. Although this is likely to be more of a priority for you in the summer months, taking time each week to keep your windows sparkling throughout the year will make a big difference to the brightness of your home.

It’s easier than you think to keep your windows sparkling and in this article, we will look at the best way to clean your windows, including the simple items you need to keep your windows streak free.

What you will need

Don’t worry, there isn’t an extensive list of complicated potions that you need to give your windows a proper clean. We recommend having the following items at home:

  • a bucket
  • a sponge
  • a squeegee (available at most DIY stores or online)
  • some newspaper or brown paper
  • a microfiber cloth
  • a lint-free cloth
  • a window cleaning solution or white vinegar

How often do you need to clean the windows?

Try adding window cleaning to your weekly chore list. By this, we mean wiping the windows with glass cleaner and removing dirt and grime from the window sills and frame. A deep clean isn’t needed this often though. Aim to give your windows a deep clean, inside and out, on a quarterly basis.

Cleaning the inside

How often have you cleaned the inside of your windows only to look a few minutes later and notice that they are streaky? It’s a common problem but one that’s easily avoided with the right tools and technique. Here’s our guide to cleaning the inside of your windows to prevent streaks:

  1. Fill a bucket with cool, clean soapy water.
  2. Run a clean microfiber cloth or sponge over the window, including the window frames.
  3. Spray the glass with your window cleaner or, if you prefer, a homemade water and vinegar cleaning solution.
  4. Use a lint-free clean cloth or alternatively, newspaper, to clean and dry the window in a Z-motion.
  5. Repeat if needed.

Cleaning from the outside

On the outside, your windows are more likely to accumulate dirt. Start by washing your dirty windows with clean water. You could even use a hose if you have access to one (and it’s appropriate to do so i.e. there isn’t a hosepipe ban in place!).

Once the excess dirt has been removed, repeat the same process as above for cleaning the inside of your windows. In addition, for the outside, we’d recommend wiping the window dry using a squeegee. Work from the top of the window to the bottom, remembering to wipe the squeegee with a clean paper towel between wipes.

For any stubborn marks, such as bird droppings, soak the area fully using white vinegar and water. Leave to stand for a few minutes before rinsing with clean water.

Expert help and advice

We hope that you’ve found this article a useful overview of how to keep your windows clean and sparkling throughout the year.

If you’re looking to upgrade your windows we’re more than happy to advise you. Don’t hesitate to get in touch with us.

Top 5 Different Types Of Windows For Your Home

07

Sep
2022
Posted By : Rachel Bownds 0 Comment
Top 5 Different Types Of Windows For Your Home
Categories :Windows

Windows provide your home with natural light, warmth in the winter months, and let in fresh air on warm days. Windows are an essential part of your property, allowing air to circulate and providing a view of the outside world.

Not all windows are the same and in this article, we’re going to look at some of the most popular types of windows. Some of which you may already have in your home and some that you might be considering upgrading to for home improvement or aesthetic purposes. Read on to find out more.

Types of windows

Do the windows in your home open outwards or inwards? Are they energy efficient or do they need replacing? Perhaps you’re not sure what types of windows you have in your home. Let’s look at some of the most popular types of windows.

1. Fixed windows

Fixed windows, which can also be referred to as picture windows, are exactly as the name suggests. They are fixed into the frame and cannot be opened or closed. These tend to be cost-effective and provide a good view of the outside world. These can provide a nice outlook, particularly if you look out onto the countryside or another type of beautiful view.

2. Casement windows

Casement windows are popular as they suit most styles of property. They can be side-hung, or have hinges on two sides, or at the top or the bottom of the window. They can include single, double, or even triple panels. We offer a wide range of casement windows in the latest designs and styles to match your home. We can even add coloured designs, Georgian bars, obscure glass, or lead work to enhance the appearance. They are also very energy efficient.

3. Tilt and turn

Another common uPVC window style is tilt and turn. They remain as popular today as in the 1980s when they were introduced, particularly in modern properties. The window opens inwards making the outside easier to clean and they are another energy efficient choice.

4. Sash windows

Sash windows are a style more common in older properties and are a popular choice as they are easy on the eye. Although those found in older properties are more likely to require regular maintenance, modern sash windows are easily opened and closed by sliding the window up and down. They provide good ventilation and newer windows are energy efficient.

5. Bay windows

Bay windows extend from the outside wall line to the floor and are often found in the living room. They were originally designed as a decorative feature and can provide a great view of the scenery outside your home. They provide rooms with lots of natural light and good ventilation, due to the extra side windows which can be opened to let air flow through.

Expert help and advice

We hope that you’ve found this article a useful overview of some popular window styles and some inspiration if you’re looking for replacement windows for your home.

If you’re looking to upgrade your windows we’re more than happy to advise you. Don’t hesitate to get in touch with us.

How To Paint Your Windows

24

Aug
2022
Posted By : Rachel Bownds 0 Comment
How To Paint Your Windows
Categories :Windows

There could be a number of reasons you’re thinking about painting your windows. From wanting to brighten the exterior of your home with a fresh new colour, to refreshing old paint that may have worn away or cracked. Whatever the reason for your painting project you’ll want to make sure that you’re prepared, with the right tools and paint for your windows.

In this article, we recommend the tools you will need, how to prep your windows for painting, and the step-by-step process.

Tools you will need

You want to paint your windows, but where do you start and what tools do you need?

Here’s what we recommend when painting uPVC windows:

  • a dust sheet, to avoid any paint splashing on the floor or other surfaces
  • a microfibre cloth
  • fine grade sandpaper
  • masking tape
  • uPVC primer or undercoat
  • a small paint brush for precision
  • uPVC paint or exterior paint

Preparing windows for painting

Preparing your windows for painting is an important first step. Begin by cleaning the window frames with a microfibre cloth, removing any dust or dirt. Do this with your windows open, making sure to get into all the corners.

Next, using sandpaper, lightly sand your windows to help the paint adhere to the uPVC surface. Then, use masking tape on the panes of glass and windowsill to ensure that paint doesn’t get onto these surfaces.

You’re now ready to start the painting process.

Step-by-step process

Choose your color

Once the preparation part is complete, you can choose your desired colour, if you haven’t done so already. Opt for either a uPVC paint or an exterior paint. The shop that you buy your paint from will be able to advise you if you are unsure which one to choose.

Apply primer

Using a clean paintbrush and gently apply a uPVC primer to your windows before applying any paint. We would advise applying two coats of primer, letting each layer dry between applications. This may take anything from a few hours up to one day, depending on the time of year.

Paint the first coat

Once the primer is fully dry, you can apply your first layer of paint. Using your paintbrush, apply the first coat of paint to your window frames by gently moving the brush in an up and down motion. Make sure to apply paint right into the corners.

You will need to apply at least two coats of paint and, depending on the colour you choose, maybe more. It’s important to let the paint dry between each coat.

Apply a final coat

When it comes to painting your final coat of paint, try to make sure you paint by moving your brush in one direction for a smooth and smart-looking finish.

Once dry, remove your masking tape.

Expert help and advice

We hope that you’ve found this advice on painting your windows useful but don’t hesitate to contact us with any questions that you may have.

If, rather than painting your windows, you’re looking to upgrade them, we’re more than happy to advise you on this change. Don’t hesitate to get in touch with us.

How To Remove Moisture From Between Window Panes

01

Jul
2022
Posted By : Rachel Bownds 0 Comment
How To Remove Moisture From Between Window Panes
Categories :Windows

During the summer months, the windows in your home are open more often throughout the day and night. However, during the winter months, you might notice a build-up of moisture on your windows. Although annoying, is this actually a problem? Well, in short, yes it can be if not dealt with. This build-up of moisture can lead to mould development which will weaken your windows and could eventually affect your health.

In this article, we look at what causes this build-up of moisture, why it shouldn’t be left untreated, and how to get rid of it. Read on to find out more.

What causes moisture build-up?

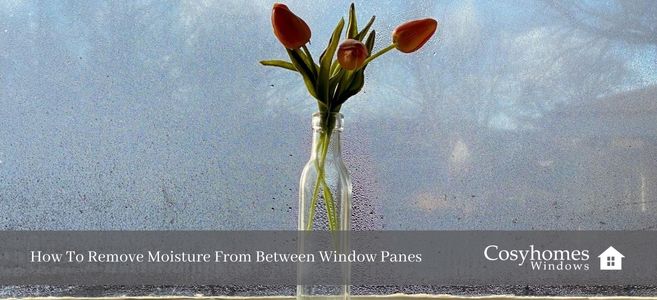
During the colder months of the year, we have the heating on which generates heat inside our homes. When this warm air combines with cold air from the outside on the surface of the glass on your windows, it can cause condensation to build if there is a weakness.. For example, if a seal is broken in your windows.

How to get rid of condensed moisture

Left untreated, this condensed moisture can cause a range of issues, including:

  • mould, which in turn will weaken your window frames and possibly affect your health
  • your windows becoming less energy efficient due to heat loss
  • your home feeling colder, as your windows are no longer keeping the warm air in. This could lead to an increase in your energy bills as you use your heating more often to compensate.

Fear not though, as there are things that you can do to fix the problem.

Replace the window

The best option to fix condensation build-up may be to replace your window or windows. Cosyhomes Windows has 45 years of experience in double-glazed window repairs and replacement. We can advise you on the best solution to remove condensation. You may not need to replace the entire window depending on how severe the problem is. We will discuss the options with you and offer our best solution to keep your windows performing at their best long-term.

Professional assistance

Another option may be for a professional to clean your affected window or windows. They will drill holes into the corners of your double pane windows and insert a cleaning solution. This can then be sucked through the bottom hole and vent plugs inserted into the small holes, allowing air and water to flow freely once again.

Expert help and advice

We hope that you’ve found this advice on window moisture useful but don’t hesitate to contact us with any questions or to arrange a consultation.

Cosyhomes Windows is here to answer any questions that you may have and advise you on the best option for your home. Don’t hesitate to get in touch with us.

How To Get Scratches Out Of Glass Windows

12

May
2022
Posted By : Rachel Bownds 0 Comment
How To Get Scratches Out Of Glass Windows
Categories :Windows

We’ve all been there – it’s a beautiful day and when looking out of your window you suddenly notice a scratch on the glass. Perhaps caused by a child’s toy being thrown against it accidentally, your pet’s claws, or a household item falling onto it.

It’s certainly a pain but most importantly, can it be removed? And if so, how?

In this article, we look at several effective methods to remove scratches from glass windows, the materials you may need, plus the importance of seeking professional advice when needed.

Where do glass scratches come from?

There are many reasons that your glass windows may become scratched – you might not actually find out what caused them. Most surface scratches can be worked on to be removed however, deeper scratches, cracks or damage mean that you will need glass replacement. If this is the case, we can work on this for you promptly, with a fast turnaround of 2 days if required.

Methods to remove scratches

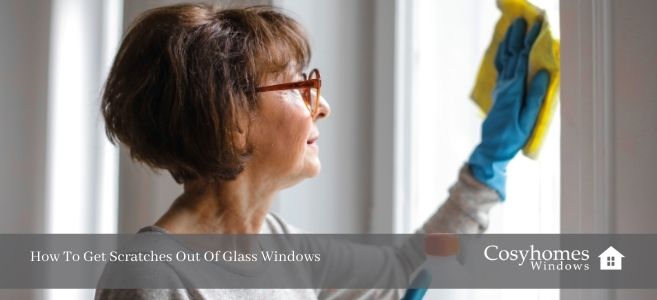
Before you begin trying to remove any scratches on your windows, first gently clean the area with a soft cloth using soap and water.

Nail polish

Believe it or not, clear nail polish can work on repairing minor scratches on glass. Apply with the polish brush to the scratch. Once dry, use nail polish remover to get rid of any excess.

Scratch filler

Scratch filler kits can be purchased online. They usually include a glass polishing compound, tools, and instructions to carry out your repair.

Metal polish

Using a lint-free cloth, try rubbing some metal polish in a circular motion into the glass scratch. Wipe away any excess with a clean, damp cloth.

Cerium Oxide

Combining cerium oxide with water will create a paste that can be used on your glass repair. Using firm pressure, apply a small amount of the paste to the damaged area using the buffer extension on a drill. Rub back and forth and repeat if the scratch is not repaired on your first attempt. Once finished, clean and dry the area with a clean, damp cloth.

Expert help and advice

If you have tried one or many of the methods mentioned above on your glass surface, but aren’t having any luck, seek expert help and advice. We are experts in our field and are happy to help, advise, and assist in the repair or replacement of your damaged glass windows. Don’t hesitate to get in touch with us.

How To Measure Double Glazed Units

21

Sep
2021
Posted By : Rachel Bownds 0 Comment
How To Measure Double-Glazed Units
Categories :Windows

Replacing your double-glazed window units could be on your mind for several reasons. Perhaps you have noticed that there is misting or condensation between the glazed glass panels, which could be due to general wear of the sealed unit. Maybe you have noticed that there is a crack or damage to the double glazed glass unit which means that it will need replacing. All of these problems are easy to fix with professional assistance.

In order to replace your double glazed unit or glass, you will first need to take some measurements. Let us guide you through how to do this.

What Parts Of The Window Do You Need To Measure?

If your entire double-glazed window unit needs replacing, you will need to measure the:

  • width
  • height, and
  • thickness

Measuring The Width

When looking to replace the whole window unit, your width measurements will need to be taken from the outside of your house or building.

Using a measuring tape, begin by taking three width measurements at the top, middle, and bottom of the unit. These measurements should be taken from the jambs (the main vertical parts forming the sides of a window frame) of each window.

To ensure that you have accurate measurements, we would recommend taking each measurement twice. The smallest of these three measurements is the one that you will need to provide to your chosen window supplier.

Measuring The Height

The measurement of the height of your window can be taken from the inside. To take this measurement, start at the area of the window sill closest to the window and take your measuring tape up to the top of the window. As with the width measurement, measure in the top, middle, and bottom and double-check by doing this twice.
Again, the measurement that is important here is the smallest one.

Don’t Forget The Thickness

Measuring the thickness of the double-glazed unit should not be forgotten. This can be done by measuring the thickness of the opening from the exterior to the interior.

What If You Only Want To Replace The Glass?

Although double-glazed windows use toughened glass, they may on occasion need to be replaced. It may be that they were installed before thermally efficient glass, which can help you to cut your energy bills, was available. Or they may be damaged.

Whatever the reason, we can offer a hassle-free change-over of glass to the latest thermally efficient double or even triple glazed sealed unit. The measurements that you will need to take to replace the glass are:

  • width from the beading on each side of the uPVC frame
  • the height from the beading on the top and bottom of the frame

The ‘beading’ is the strip of timber, plastic, or aluminum at the edge of the windowpane that holds it in place within the frame.

Before you provide your window supplier with these measurements, you will need to deduct 10mm from each one.

If you don’t feel confident in taking these measurements, we are here to help. One of the experienced Cosyhomes Windows team can visit the property, take measurements and provide a free quotation. Submit an enquiry via our website or call 020 8397 4040.

How To Adjust UPVC Windows

08

Jul
2021
Posted By : Rachel Bownds 0 Comment
How To Adjust UPVC Windows
Categories :Windows

UPVC is a material chosen for window frames for its durability. Unlike other materials like wood. It is also water-resistant.

If you live in a modern building, it’s very likely that your windows will be double glazed and UPVC. However, if your UPVC windows have been installed for some time, you may find that you have trouble opening and closing them. Maybe they have warped slightly and need a bit of adjustment.

Depending on the problem and whether you are confident with DIY, you can probably adjust the windows yourself.

In this article, we look at some common problems with double glazing UPVC windows and how you can fix them. Read on to find out more.

Why Isn’t My UPVC Window Closing Properly?

If your window isn’t closing properly – perhaps it is sticking – you will need to adjust the height.

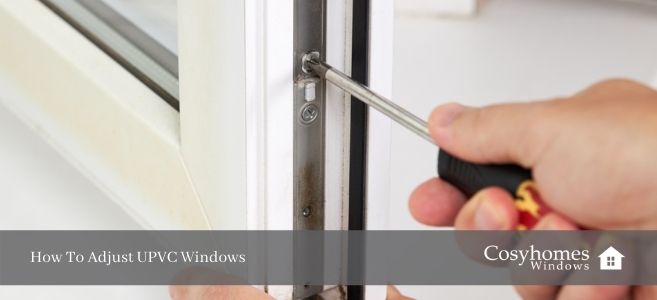
This is fairly easy to do and can be done by loosening the screws at the side of the window. Turn the screws with a screwdriver and then readjust the sashes into the frame. Next, tighten them up again. It might be worth asking someone to help you when doing this.

What If The Problem Is With The Hinges?

If you think that the hinges on your windows may be past their best, rather than refitting the window hinges yourself it’s worth contacting a double-glazing company who can replace them. We’re happy to help with this, just request a callback.

Are Top-Hung Windows Harder To Adjust?

If your windows swing open from the top or the bottom, these are called top-hung windows.

These windows need to have enough friction on the hinge so that they will stay open. If you have too much friction though, they can be hard to open.

Top hung windows have hinges with a friction stay. This friction stay can be adjusted on the hinge – either tightened or loosened – to apply or release pressure to hold the window open or loosen the window hinge.

When adjusting you need to locate the friction stay on the hinge and adjust the screws in the right direction.

Will I Damage The Window If I Do A Repair Myself

Depending on the amount of adjustment, there is always a risk that you may damage the window if you do the repair yourself. If you adjusted screws and were unable to put them back, or couldn’t close the window properly, this would be a home security risk.

If you are not confident or would just like the reassurance of using someone who is a specialist, always err on the side of caution.

At Cosyhomes Windows, we offer a range of window repairs and can advise you on the best course of action; more often than not the answer is simple and quick. We have a wealth of experience and can find the right solution for you.