Selecting the right window style for your home directly impacts your energy bills, property value, and daily comfort. Yet, many homeowners find themselves overwhelmed by the choice between casement windows and sash windows. Each window type operates differently, suits distinct architectural styles, and delivers varying levels of thermal insulation and ventilation. Making the wrong decision could mean living with draughty rooms, compromised period aesthetics, or unnecessarily high heating costs.
This article breaks down everything you need to know about both window types. We’ll review how each operates, compare their energy efficiency and security features, and help you determine which option best suits your property type, budget, and personal preference. Whether you’re renovating a Victorian terrace or fitting out a modern new build, understanding the key differences between casement, sash, and tilt and turn windows will help you to ensure you make an informed choice that enhances both the look and performance of your home.
Understanding Casement vs Sash Windows: Key Differences
The fundamental distinction between casement and sash windows is how they open and close. Casement windows open outwards on side-mounted hinges, swinging horizontally like a door, while sash windows feature movable panels that slide vertically within the window frame. This core mechanical difference results in significant variations in appearance, operation, and suitability across different property types.
Both modern casement windows and modern sash windows now benefit from advanced glazing technology, superior materials, and enhanced security features. However, their distinct operating mechanisms continue to influence their performance characteristics, maintenance requirements, and aesthetic impact on your property’s exterior.
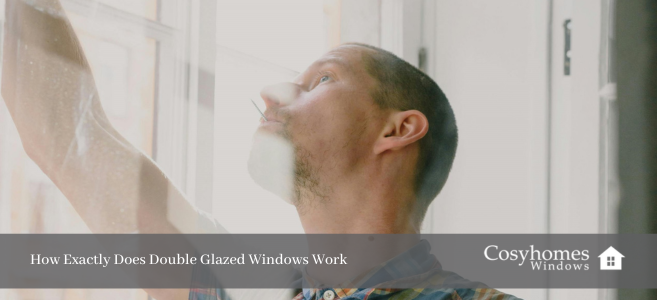
How Casement Windows Work
Casement windows operate using hinges mounted on one side of the window frame, allowing the entire sash to swing open outwards. A handle-operated crank or lever mechanism engages multi-point locks that pull the window firmly against the frame when closed, creating a compression seal that minimises air infiltration.
This design allows casement windows to open fully, up to 100% of their total area, providing maximum ventilation and unobstructed views. The outward-opening action also means rain is directed away from the interior when windows are left partially open during light showers.
The mechanism’s simplicity makes casement windows particularly practical for hard-to-reach locations, such as above kitchen sinks or behind furniture. A single turn of the handle operates the entire system, making them accessible for users of all abilities.
How Sash Windows Work
Sash windows consist of two sliding panels, upper and lower sashes, that move vertically within the window frame. Traditional designs use a counterbalance system of weights, pulleys, and cords concealed within the frame to offset the sash weight, allowing windows to stay positioned at any height without slipping.
A double-hung sash window allows both the top and bottom panels to slide, enabling flexible ventilation control. You can raise the bottom sash for direct airflow, lower the top for passive ventilation, or adjust both the top and bottom sections to create cross-flow air circulation throughout the room.
Modern sash windows often replace traditional counterweights with spring balance systems, reducing maintenance requirements while maintaining smooth operation. The vertical sliding mechanism requires sufficient frame width, typically at least two feet, to accommodate the balance hardware and ensure proper function.
Visual and Architectural Differences
The visual impact of these window types differs substantially. Casement styles typically feature larger, uninterrupted glass panes with minimal horizontal obstructions, allowing more natural light into interiors. Sash windows traditionally incorporate glazing bars creating multiple smaller panes, producing the classic divided-light appearance associated with period properties.
From the exterior, casement windows sit flush within the wall opening when closed but project outward when open. Sliding sash windows remain entirely within the frame at all times, maintaining a flush external profile that suits the proportions of Georgian and Victorian façades.
The choice between these window styles often depends on your property’s architectural style. Period homes in conservation areas typically require sash windows to maintain street-scene coherence, while contemporary builds benefit from the sleek profiles of modern casement windows. Both options now come in timber windows, uPVC, and aluminium frames to suit various architectural styles and budget requirements.
Performance Comparison: Energy Efficiency, Security, and Functionality
When comparing sash and casement windows on practical performance, there are measurable differences in thermal efficiency, ventilation capability, and security. These factors directly affect your daily comfort, energy bills, and peace of mind.
Modern manufacturing techniques have significantly improved both window types, with double glazed and triple-glazed options available across casement and sash designs. However, fundamental differences in their opening mechanisms create inherent performance variations worth understanding before making your selection.
The best choice depends on prioritising which performance characteristics matter to you most, whether that’s maximum airflow for a stuffy bedroom, superior draught proofing for an exposed living room, or traditional aesthetics for a listed property.
Energy Efficiency and Draught-Proofing
Casement windows typically deliver superior energy efficiency due to their compression seal design. When closed, the outward-swinging sash presses firmly against the frame, creating a tighter seal that minimises air leakage. Vinyl casement windows commonly achieve U-values around 0.30, while timber casement versions reach approximately 0.28 with proper installation.
Sash windows present slightly higher U-values, around 0.32 for vinyl and 0.30 for timber, primarily because the vertical sliding mechanism creates potential gaps at the meeting rail where two panes overlap. However, modern sash windows incorporate improved weatherstripping, brush seals, and precision manufacturing that significantly reduce these traditional weaknesses.
Draught-proofing casement windows is more straightforward due to fewer moving parts, while sash designs require careful attention to multiple sliding tracks. Both benefit substantially from low-E coatings, argon gas fills, and insulated glass units. In cold climates, casement windows’ airtightness typically reduces heating demand more reliably, though well-specified modern sash windows can achieve competitive thermal insulation performance.
Ventilation and Natural Light
For maximum ventilation, casement windows open horizontally to their full extent, capturing side breezes effectively and providing maximum airflow across the entire opening. This makes them ideal for kitchens, bathrooms, and any space requiring rapid air exchange.
The benefits of sash windows for ventilation lie in their precise control. Opening just the top section creates passive ventilation that draws warm air out while minimising draughts at occupant level. Adjusting both sliding panels simultaneously generates efficient cross-flow circulation. However, practical ventilation area remains limited compared to fully-open casements.
Natural light entry favours casement windows, which support larger uninterrupted single panes and wider sightlines. Sash windows’ central meeting rail and traditional muntin bars create visual divisions that slightly reduce light transmission, though many homeowners consider this classic look an aesthetic benefit rather than a compromise.
Security and Maintenance
Security casement windows benefit from multi-point locking systems that engage at multiple points around the frame, even when partially open for ventilation. This provides enhanced protection compared to traditional sash window locks positioned only at the meeting rail, though modern sash designs now incorporate similar multi-point systems meeting PAS 24 security standards.
Maintenance requirements differ significantly. The benefits of casement windows include easy access to both interior and exterior glass surfaces – simply swing open for cleaning. Fewer moving parts mean less potential for mechanical failure, with durable hinges lasting decades with minimal attention.
Traditional timber sash windows require more regular maintenance to prevent sticking sashes, cord deterioration, and potential rot in exposed components. However, tilt-in sash designs have addressed cleaning accessibility concerns, while spring balances reduce the friction and wear associated with older pulley systems. The complexity of casement windows for maintenance is generally lower, making them preferable for homeowners prioritising minimal upkeep.
Choosing the Right Window Type for Your Property
Selecting between casement and sash windows depends on balancing practical requirements with aesthetic preferences and budget. Neither option is universally superior. The right window style depends entirely on your property’s character, location, and your priorities for performance versus appearance.
Planning regulations can influence this decision for many homeowners. Listed buildings and properties within conservation areas typically require like-for-like replacement with traditional sash windows, while modern developments face no such restrictions. Understanding these constraints early prevents costly specification changes later.
Cost considerations extend beyond initial purchase price to include long-term energy savings, maintenance expenses, and potential property value impacts. A window that seems economical upfront may prove more expensive over its lifetime when all factors are considered.
Why Choose Cosyhomes Windows?
Choosing the right window style is only half the decision. The quality of manufacture, specification, and installation is what ultimately determines performance, longevity, and value. At Cosyhomes Windows, we specialise in supplying and installing high-performance windows tailored to UK homes.
We offer a full range of casement and sash windows in uPVC, timber, and aluminium, all manufactured to meet modern energy efficiency and security standards. Our windows are designed to reduce heat loss, minimise draughts, and improve acoustic insulation, helping to lower energy bills while increasing everyday comfort.
Every installation is carried out by experienced, in-house fitters rather than subcontractors. This ensures consistent workmanship, correct fitting, and compliance with current building regulations. We also provide honest guidance on planning constraints, including conservation areas and listed buildings, helping homeowners avoid costly mistakes.
From initial survey through to final installation, Cosyhomes Windows focuses on clear communication, accurate lead times, and durable products built for the British climate.
Speak to Us for Expert Advice
If you are deciding between casement and sash windows, professional advice can save time, money, and future frustration. Cosyhomes Windows offers free, no-obligation consultations to assess your property, discuss your priorities, and recommend the most suitable window solution.
Whether you are upgrading a modern home, restoring a period property, or replacing inefficient existing windows, our team can help you specify the right style, material, and glazing for long-term performance and visual appeal.
Contact Cosyhomes Windows today to arrange your free survey and receive tailored advice on casement and sash windows designed for your home.
Conclusion
The choice between casement windows and sash windows ultimately depends on your property’s architectural character, your performance priorities, and your budget constraints. Casement windows deliver superior energy efficiency through their compression seals, provide maximum ventilation capability, and require minimal maintenance – making them ideal for modern homes and practical-minded homeowners.
Sash windows offer authentic period aesthetics that cannot be replicated, controlled ventilation flexibility, and compliance with heritage requirements essential for listed buildings and conservation areas. Modern sash windows now incorporate improved thermal insulation, enhanced security features, and easier maintenance than their traditional counterparts, narrowing the performance gap with casement alternatives.
Both window types can deliver excellent results when properly specified and professionally installed. The key lies in matching window style to property type, prioritising the performance characteristics that matter most for your situation, and investing in quality products with appropriate glazing and hardware specifications.
For personalised advice on the right window style for your specific property, consult our experienced window specialists who can assess your requirements, navigate planning considerations, and recommend specifications that balance aesthetics, performance, and value for your individual circumstances.
Frequently Asked Questions
Are sash windows more expensive than casement windows?
Yes, sash windows typically cost more than equivalent casement designs due to their more complex sliding mechanism, counterbalance systems, and manufacturing requirements. However, price differences vary based on materials, glazing specifications, and customisation. Premium casement windows can exceed basic sash options.
Which window type is more energy efficient?
Casement windows generally offer better energy efficiency due to their compression seal design, creating a tighter seal when closed. They typically achieve lower U-values than comparable sash windows. However, modern sash windows with quality weatherstripping and double glazing can achieve competitive thermal performance.
Can I install casement windows in a conservation area?
This depends on your specific local planning authority requirements. Many conservation areas mandate like-for-like replacement with traditional sash windows to maintain street-scene character. Always check with your planning authority before specifying window replacements in protected areas, as unauthorised changes may require costly reversal.
Which windows are easier to clean and maintain?
Casement windows are generally easier to maintain, with fewer moving parts and full access to both glass surfaces when opened. Traditional sash windows require more attention to prevent sticking and cord deterioration, though modern tilt-in designs significantly improve cleaning accessibility.
Do sash windows provide better security than casement windows?
Modern versions of both window types can achieve equivalent security standards, including PAS 24 certification. Casement windows traditionally offered better security through multi-point locking, but contemporary sash windows now incorporate similar systems. Security depends more on hardware specification than window type.